This time I will show you how to use the fast development framework: Opexava. This framework is very interesting since it can be a fast solution for projects with no time, for demos, even for business projects. As everything has its advantages and disadvantages. Let’s begin!!
Requirements:
- 01.Openxava Framework
- 02.Libraries ejb.jar - jta.jar
- 03.Mysql Database
- 04.Driver or Middleware for Mysql
- 05.Eclipse IDE
How it works?
Openxava convert java pojos to java web application.

Basics Concepts:
Business Component
The main part OpenXava are the business component. In the Openxava world, business component is a java class with jpa annotations.
Controllers
A controller is a set of actions. An action could be a button or hyperlink which user could be use.
Application
An application is a set of modules. A module is a business component with one or more controllers.
In this post, We are going to create a java web application (war file) and deploy it in tomcat server.
Steps
1.- Create Openxava Project from Template.
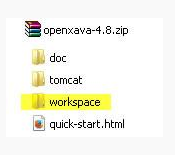
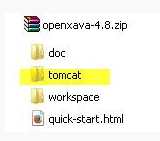
Download openxava zip from http://www.openxava.org/es/downloads and unzip it. It should look like:
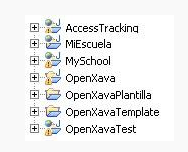
Using eclipse open the workspace folder. It should look like:
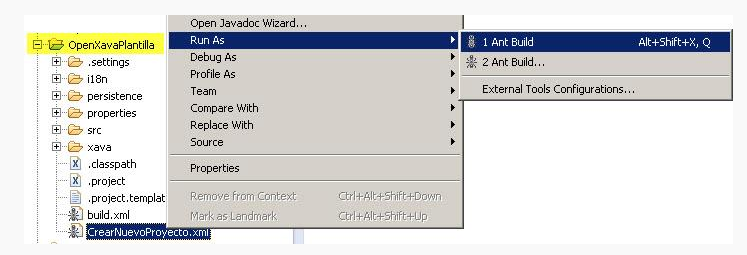
So now, in order to create a new project, we execute an ant task called CrearNuevoProyecto.xml located inside of OpenXavaTemplate project
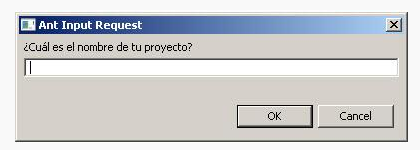
Enter some name of application. In this case : “Empresa”
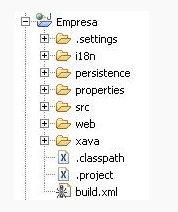
After some minutes, a nre project called Empresa is ready to use due to openxava engine. Select this new project and F5
2.- Java Entities
Firs we need create a package. If my application is empresa, a common package could be : org.empresa.model or com.empresa.model. After that , we need a new java class. In this example : Cliente.java
This class will become in a module
3.- Database configuration
Only this files should be changed:
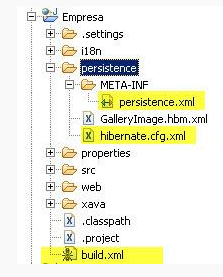
Persistence.xml
hibernate.cfg.xml
build.xml
Descargamos el driver de coneccion para nuestra base de datos. Para este ejemplo usaremos mysql.(Requisito numero 4)
Luego en el archivo build, en el tag :
Download mysql driver (#4 requirement). After that, update tag
This step is only to : database tables creation. In deployment stage, this jar file should be added to application or tomcat server.
context.xml
Add a new datasource in context.xml file, located inside conf tomcat folder :
Files should look like :
4.-Tables creation from java model
- Create a new scheme in database called empresa. This scheme should be same as used in persistence.xml , hibernate.cfg.xml and context.xml
jdbc:mysql://localhost:3306/empresa
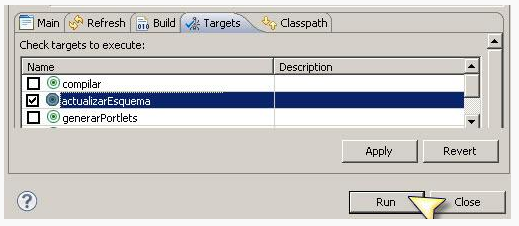
- Start mysql and execute ant task called : updateSchema. Right click in build.xml > run as > ant build … and select “update schema”

If no errors, console look like:
https://gist.github.com/jrichardsz/6964217
Go to your database and new tables appear.
5.- Build artifact : .war
As default, Openxava has configured an ant task to directly deploy the project. Openxava has its own tomcat inside downloaded zip:
This is good for a demo but for real environments we need an artifact in order to deploy it in some server.
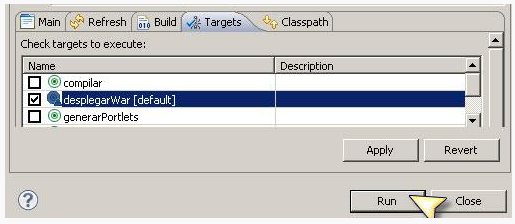
To do that, we need to change build.xml file and enable target=”deployWar” task:
Now execute deployWar ant task. Right click in build.xml > run as > ant buil …
If no errors, console look like:
https://gist.github.com/jrichardsz/6959755
We can see the war file path in log :
[jar] Building jar: \..\openxava_download\workspace.dist\Empresa.dist\Empresa.war
Note: This way need 3 jars : ejb.jar, jta.jar y mysql-connector-java-5.1.18.jar
We have two choices:
-
Unzip our war file and add this jars to WEB-INF\lib folder.
-
Add this jar in tomcat server (lib folder)
Deploy web application
Finally, we deploy our war file as any java web application. In tomcat case, copy war file to webapps folder:
..\..\apache-tomcat-7.0.39\webapps
and execute startup.bat located in
..\..\apache-tomcat-7.0.39\bin
if all is good, no errors in tomcat appear.
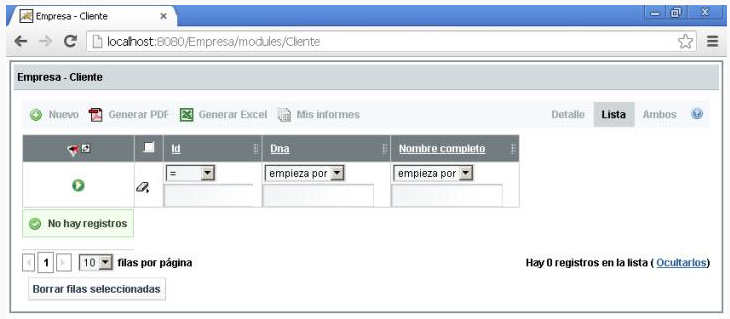
7.-Access to web application:
URL could be something like this:
http://<app-server-host>:<port-app-server>/<eclipse-project-name>/modules/<name-of-java-class>
In our case:
http://localhost:8080/Empresa/modules/Cliente
And in browser:
Tomcat log look like:
https://gist.github.com/jrichardsz/6964425
War of this post could be downloaded from:
https://github.com/jrichardsz/videotutoriales/blob/master/000016/resources/workspace/Empresa.rar
So after all, we have a CRUD application ready to use!!
HTH.
System.exit(0)
Until the next,
JRichardsz
